Butter Mochi Cake (Hawaiian Glutinous Rice Coconut Cake)

Butter Mochi Cake (Hawaiian Glutinous Rice Coconut Cake)

Quick answer

Butter mochi cake is a Hawaiian baked dessert that uses sweet glutinous rice flour as its structural foundation, resulting in a single slice that contains both the dense...

What makes this special

  • Butter Mochi Cake yields a dense Hawaiian dessert with a chewy rice flour base and a crisp golden top.
  • During baking, the bottom turns into a chewy mochi layer while the top caramelizes crisp
  • 200ml coconut milk lays a tropical backdrop in this Hawaiian staple
Total time
65 min
Level
Easy
Servings
4 servings
Ingredients
7
Calories
430 kcal
Protein
7 g

Key ingredients

sweet rice floursugarmilkcoconut milkeggs

Core cooking flow

  1. 1 Preheat the oven fully to 175°C, then coat the inside of the baking pan with...
  2. 2 Put 220g sweet rice flour and 140g sugar in a large bowl and whisk for about 30 seconds.
  3. 3 Add 240ml milk and 200ml coconut milk first, whisking until the flour is moistened, then beat in 3 eggs.

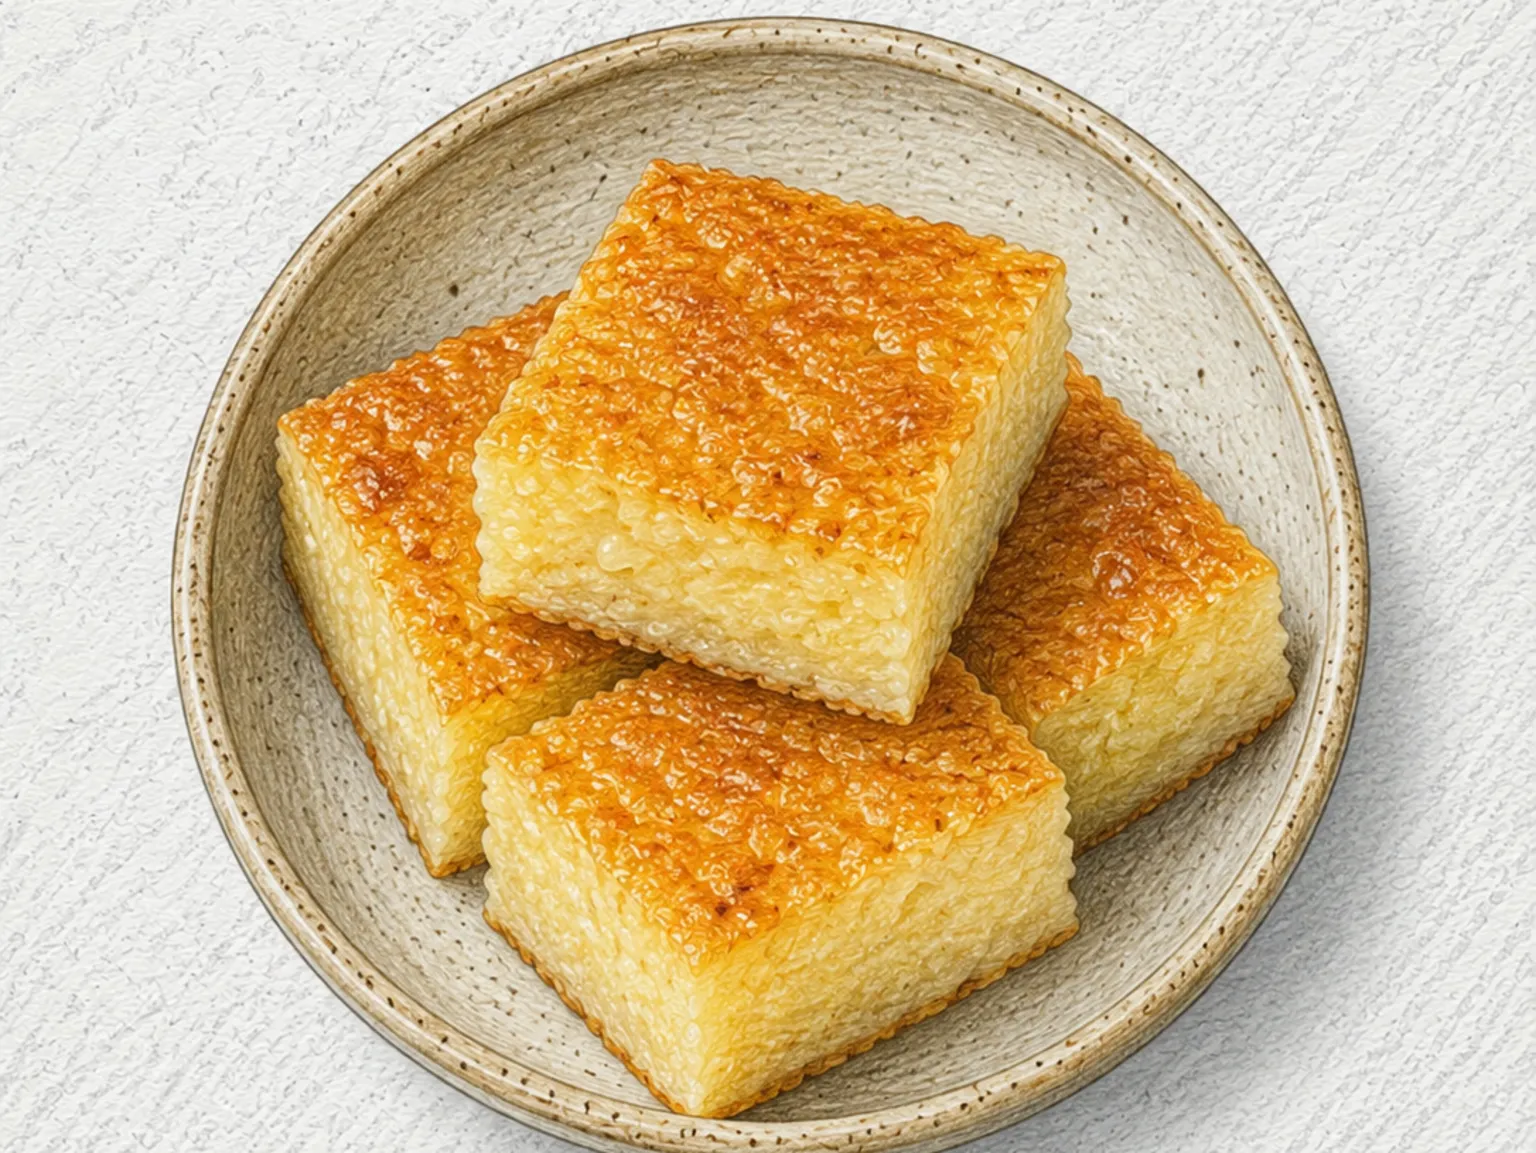
Butter mochi cake is a Hawaiian baked dessert that uses sweet glutinous rice flour as its structural foundation, resulting in a single slice that contains both the dense chewiness of a mochi rice cake and the golden, lightly crisp crust of a conventional baked good. The batter is thin and pourable - sweet rice flour combined with sugar, eggs, melted butter, whole milk, and coconut milk - and it is baked low and slow in a rectangular pan until fully set. During the long bake, the bottom of the cake densifies and becomes chewy in the way mochi does, trapping moisture within the glutinous starch structure. The top surface, meanwhile, dries out and the sugars caramelize into a thin hazelnut-brown crust with a faint crunch. Coconut milk threads a subtle tropical aroma throughout every bite without dominating. The butter dissolves into the starch matrix during baking, replacing the neutral, slightly sticky character that plain mochi can have with a warm, dairy-rich depth. At room temperature, the chewiness is most pronounced. Gently rewarmed in an oven or toaster, the crust crisps back up and the textural contrast between the two layers becomes more vivid.

Prep 15min Cook 50min 4 servings
Recipes by ingredient → milk egg butter

Instructions

Read the steps as a cooking flow: prep, heat, seasoning, doneness control, and finish.

6 steps
  1. 1
    Control

    Preheat the oven fully to 175°C, then coat the inside of the baking pan with a thin, even layer of unsalted butter.

    Cover the corners as well so the sticky rice cake layer releases cleanly after cooling.

  2. 2
    Finish

    Put 220g sweet rice flour and 140g sugar in a large bowl and whisk for about 30 seconds.

    Break up any visible lumps now, because dry pockets can leave uneven chewy spots in the finished cake.

  3. 3
    Step

    Add 240ml milk and 200ml coconut milk first, whisking until the flour is moistened, then beat in 3 eggs.

    Scrape the bottom and sides of the bowl so no dry rice flour stays hidden.

  4. 4
    Season

    Whisk in 60g melted unsalted butter and 1 teaspoon vanilla extract until the batter looks smooth and glossy.

    The batter should be thin and pourable, so do not add extra flour even if it seems loose.

  5. 5
    Heat

    Pour the batter into the prepared pan and tap it on the counter two or three times to release large bubbles.

    Bake at 175°C for 45 to 50 minutes, until the top turns hazelnut brown.

  6. 6
    Prep

    Remove the cake when the edges pull slightly from the pan and the center no longer wobbles loosely.

    Let it cool completely before cutting into squares, because warm mochi tears instead of slicing cleanly.

After the steps

Pick a recipe that fits this dish.

Continue with shared ingredients, meal pairings, or a similar method.

Recipes That Go Well With This

More Baking →

Based on shared ingredients and meal pairing

Blondie Bars
Shared ingredient: egg Baking

Blondie Bars

Blondie bars take the dense, fudgy structure of brownies and replace the chocolate with the caramel depth of browned butter and brown sugar. Cooking the butter slowly until it turns a deep golden-brown color produces a pronounced nutty, toasted aroma that functions as the flavor backbone of the entire bar - more complex than plain melted butter can deliver. Brown sugar dissolves into the browned butter and contributes a toffee-like sweetness with a molasses undertone that white sugar simply cannot replicate. Eggs and vanilla extract add warmth, richness, and depth to round out the flavor. Using a modest amount of flour is deliberate: too much tips the texture toward cakey, while the right quantity keeps the baked bars dense, chewy, and slightly underdone in the center. The surface develops a thin, crackly shell during baking, while the interior stays soft and slightly sticky - that contrast of textures is central to a properly made blondie. The bars must cool completely before slicing; cutting too early causes them to collapse and lose their clean edges.

Brown Butter Chocolate Chip Cookies
Shared ingredient: egg Baking

Brown Butter Chocolate Chip Cookies

Brown butter chocolate chip cookies build on the familiar template by introducing browned butter, which is cooked over medium heat until the milk solids caramelize and turn golden, releasing an aroma of toasted hazelnuts and toffee that standard melted or creamed butter cannot produce. The browned butter is combined directly with brown sugar while still warm, which helps it dissolve completely and speeds up the mixing process. A high ratio of brown sugar relative to white sugar produces cookies with thin, crisp edges and a dense, chewy center that sinks slightly when pressed. Dark chocolate cut into rough chunks melts unevenly during baking, leaving some pockets fully liquid and others still partially solid, creating texture variation in each bite. Flaky sea salt pressed lightly onto the tops of the cookies before baking sharpens the sweetness and amplifies the chocolate flavor in a way that fine salt mixed into the dough cannot replicate. Fresh from the oven the cookies look underdone and collapse slightly when touched, but ten minutes of resting on the pan allows the structure to set: the edges firm up to a gentle snap while the center stays yielding and fudgy.

Chicago Deep Dish Pizza
Serve together Western

Chicago Deep Dish Pizza

Chicago deep dish pizza is a pie-style pizza where dough is pressed into a deep cast iron or dark metal pan to cover the bottom and climb the walls, then layered with mozzarella cheese and Italian sausage before crushed tomatoes and oregano are spread across the top. Positioning the sauce on the uppermost layer shields the cheese from direct oven heat, preventing it from scorching while the tomato reduces and concentrates over the long bake. The sausage must be pre-cooked with onion to drive off excess moisture, keeping the thick base from turning soggy under the weight of the filling. Stretching the dough wide enough to reach the rim keeps the molten contents contained during baking. After 30 to 35 minutes at 220 degrees Celsius, the pizza requires at least ten minutes of resting before slicing so the interior sets and the layers hold their shape when cut. The dish traces its origins to Pizzeria Uno in Chicago in 1943 and has since become one of the city's defining foods.

Thumbprint Jam Cookies
Similar recipe Baking

Thumbprint Jam Cookies

A buttery shortbread-style dough is rolled into small balls, each pressed with a thumb to create a shallow well that is then filled with fruit jam before baking. The cookie base is crumbly and melt-in-the-mouth, providing a rich, neutral canvas that lets the jam flavor come forward. Different jams - raspberry, apricot, strawberry - produce different colors, so baking an assorted tray creates a visually striking spread. The thumb impression should be gentle and not too deep; a very thin base cracks during baking and cannot support the filling. Filling each well only halfway prevents the jam from bubbling over the edges in the oven. As the cookies cool, the jam sets into a glossy, jewel-like surface that is slightly tacky and intensely fruity. The final result is a cookie that is simultaneously crunchy from the baked edges, sandy from the shortbread crumb, and chewy from the cooled jam center.

Serve with this

Black Sesame Brownies
Desserts Easy

Black Sesame Brownies

Black sesame brownies are built on a base of dark chocolate and butter melted together over a double boiler, with roasted black sesame powder sifted in before folding. The bitter edge of the chocolate meets the toasted, grain-like aroma of the sesame, adding a nutty depth that standard brownies lack. The cake flour ratio is kept low to produce a fudgy, dense center that stays slightly underdone-looking even after the full bake at 175 degrees Celsius for twenty to twenty-five minutes. Because black sesame powder is naturally oily and prone to clumping, it must be sifted together with the flour and salt before going into the batter - skipping this step leaves uneven pockets of undistributed sesame. Pull them from the oven with a faint wobble at the center, and the residual heat finishes the interior as the pan cools. Wait until fully cool before cutting for clean edges.

🧒 Kid-Friendly
Prep 15min Cook 25min 4 servings
Fruit Cottage Cheese Bowl
Salads Easy

Fruit Cottage Cheese Bowl

This high-protein bowl requires no cooking and comes together in under five minutes. A generous scoop of cottage cheese forms the base, and fresh strawberries, blueberries, and banana are arranged on top in whatever combination looks appealing. The cheese's mild, lactic saltiness pairs naturally with the fruit's sweetness without needing any added dressing or seasoning. Sliced almonds contribute crunch and a layer of healthy fats, while chia seeds provide omega-3s and a subtly gel-like texture once they have had a moment to absorb the moisture around them. A light drizzle of honey brings all the components together with a unifying sweetness. The simplicity of the bowl makes it a practical choice for a quick breakfast or a post-workout meal when protein matters but time is short.

🥗 Light & Healthy 🧒 Kid-Friendly
Prep 8min 2 servings
Fresh Lemon Ade
Drinks Easy

Fresh Lemon Ade

Fresh lemonade is a citrus drink assembled by pouring hand-squeezed lemon juice and simple syrup over ice, then topping slowly with sparkling water. The sharp acidity of fresh lemon is tempered by the syrup's rounded sweetness, creating a balance that bottled juice cannot replicate. A tiny pinch of salt amplifies both the sweet and sour notes simultaneously, a small addition with a noticeable effect. Lemon slices and mint leaves added to the glass release fragrance continuously as the drink sits. Pouring the sparkling water last and gently preserves the carbonation through every sip, so the order of assembly matters as much as the ingredients themselves.

🍺 Bar Snacks ⚡ Quick
Prep 7min 2 servings

Similar recipes

Baked Alaska
Baking Hard

Baked Alaska

Baked Alaska is a dessert where sponge cake and ice cream are encased in Italian meringue without any gaps, then baked briefly at high heat. The meringue acts as an insulating shell, preventing the oven's intense heat from reaching the frozen core. For this to work reliably, the meringue must be applied thickly and cover every part of the surface. The ice cream needs at least four hours in the freezer before assembly so it stays solid through the brief bake, and the finished dome should go back into the freezer immediately after construction and stay there until just before browning. Egg whites whipped with sugar to stiff peaks form the meringue shell, which is then torched or placed in a 250-degree oven for two to three minutes until the surface turns golden brown. Adding vanilla extract to the meringue releases its aroma during browning. When sliced, three distinct layers become visible in cross-section: charred meringue, frozen ice cream, and moist sponge cake beneath. The contrast between the scorched, warm exterior and the frozen core is the defining quality of this dessert, and the visual reveal when the knife cuts through makes it as much a performance as a dish.

🎉 Special Occasion 🧒 Kid-Friendly
Prep 40min Cook 5min 8 servings
Bibingka (Filipino Coconut Rice Cake)
Asian Easy

Bibingka (Filipino Coconut Rice Cake)

Bibingka is a Filipino baked rice cake that belongs almost entirely to the Christmas season, sold warm from clay-pot stalls outside churches after Simbang Gabi, the nine-day series of dawn masses leading up to Christmas Day. For Filipinos, the smell of bibingka cooking over charcoal at four in the morning is inseparable from the feeling of the holiday itself. The batter is made from ground rice flour mixed with coconut milk, eggs, and sugar, then poured into a clay pot lined with fresh banana leaves. The pot sits between two layers of live charcoal - one below and one held above on a metal lid - so both surfaces cook simultaneously. This top-and-bottom heat is what gives bibingka its characteristic crust: lightly charred and fragrant on the outside from the banana leaves, moist and tender within. As the batter cooks, the banana leaves release a vegetal green fragrance that infuses into the rice cake and leaves faint dark marks on the underside. Midway through cooking, slices of salted duck egg are pressed into the surface alongside fresh coconut shavings, then a brush of butter is applied and the cake returns to the heat. During this final pass the sugars in the butter and batter caramelize at the edges, producing a triple wave of banana leaf, coconut, and butter aromas. The finished texture sits somewhere between a glutinous rice cake and a sponge cake - slightly sticky and chewy yet airy and soft. The salted egg cuts through the sweetness and gives each bite a complexity that plain sweetness alone cannot provide. Bibingka vendors outside Philippine churches in December, tending glowing braziers in the pre-dawn darkness, are one of the country's most enduring Christmas images.

🎉 Special Occasion 🧒 Kid-Friendly
Prep 15min Cook 30min 4 servings
Stuffed Bell Peppers
Western Medium

Stuffed Bell Peppers

Stuffed bell peppers are hollowed out, filled with a sautéed mixture of ground beef, onion, garlic, tomato sauce, and cooked rice, then baked until the peppers soften and the filling is heated through. Trimming the tiniest slice from the bottom of each pepper creates a flat base so they stand upright in the baking dish without tipping over, but cutting too deep will open a hole and leak filling. The filling should be seasoned a touch saltier than seems right on its own, because the pepper's natural sweetness will balance it out during baking. After 30 minutes at 190 degrees Celsius, mozzarella goes on top for a final 10-minute bake that melts the cheese into a seal over the filling, keeping it moist. The interplay of the pepper's sweetness, the tomato sauce's acidity, and the beef's savory depth makes this a nutritionally balanced one-dish meal.

🎉 Special Occasion
Prep 20min Cook 40min 4 servings

Tips

Allow full cooling so the chewy texture sets properly.
Increase coconut milk slightly for stronger aroma.

Nutrition (per serving)

Calories
430
kcal
Protein
7
g
Carbs
57
g
Fat
19
g